Create an SMTP connection from SAP to Office 365
Many companies use Office 365. This package also includes Microsoft Exchange to send emails. The following tutorial explains how to configure the e-mail outbox in SAP to establish an SMTP connection from SAP to Microsoft 365. As a result, you can then send emails directly from SAP.
Steps to configure the e-mail output in SAP
Step 1) Check the network connection from SAP to Office 365
- Ping the server smtp.office365.com from the SAP server
Step 2) Set the ICM parameter in the instance profile
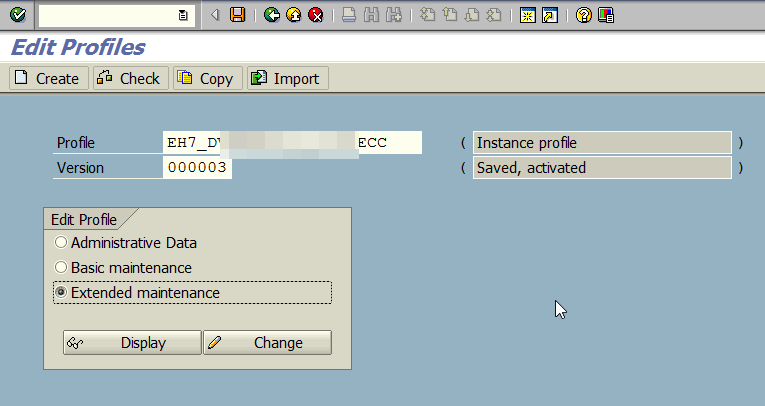
- Transaction RZ10
- Selection of the instance profile. The instance profile has the system ID and / or the name of the server in the name
- Select “Maintain extended”
- Maintain an entry for the parameter icm / server_port_1
- Then enter the following parameter value:
- PROT = SMTP, PORT = 0, TIMEOUT = 120 PROCTIMEOUT = 120, TLS = 1
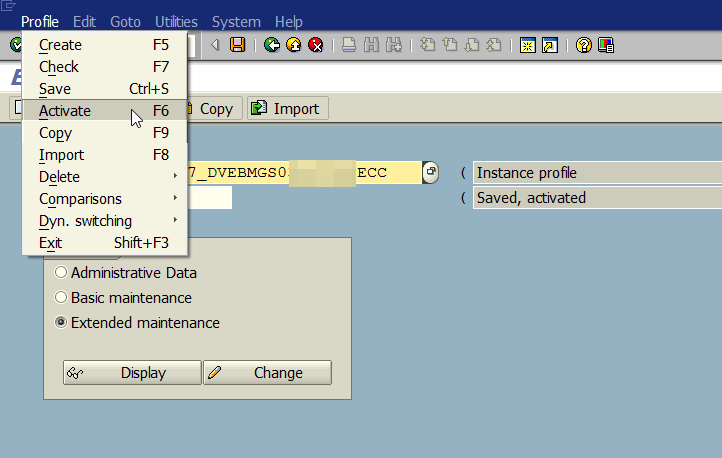
- Then activate the profile.
Step 3) Reboot the ICM Services
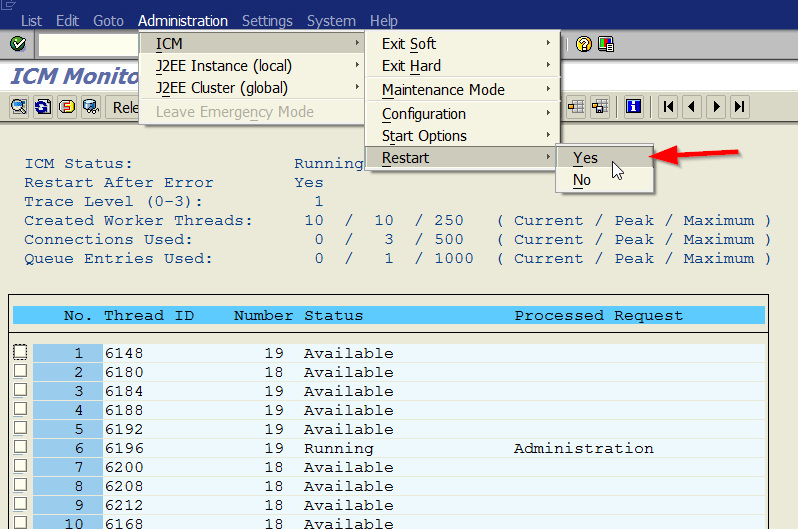
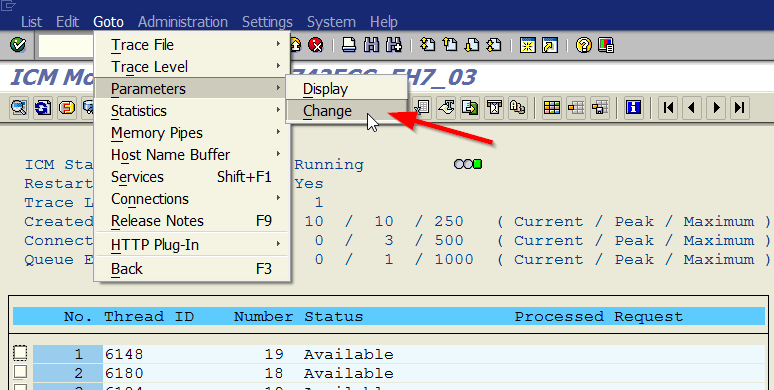
- Transaction SMICM
- Restart the ICM services
- Then check in the parameters whether the parameters set in the RZ10 have also arrived.
- The parameter must now appear.
- If the parameter for icm / server_port_1 has not been updated by restarting the ICM services, you can do the following:
- a) Hard stop of ICM services, then reboot
- b) Shut down and restart the SAP application server
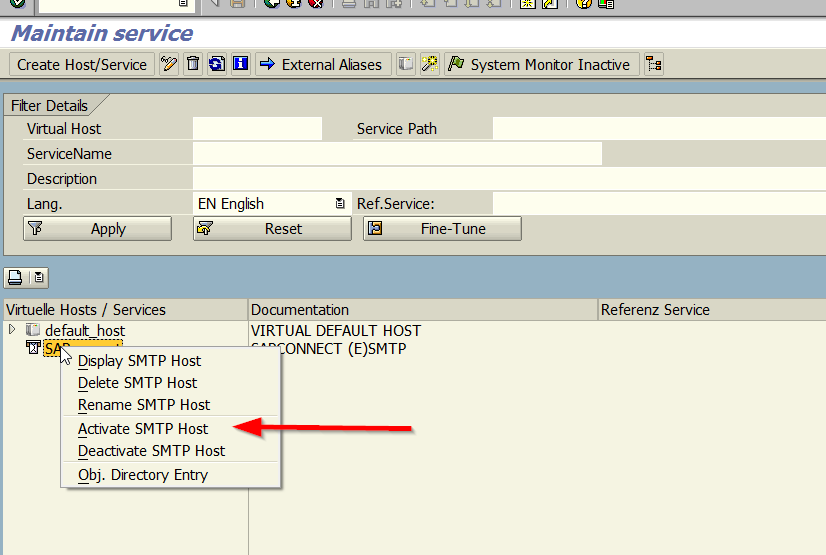
Step 4) Enable the SAP SMTP service
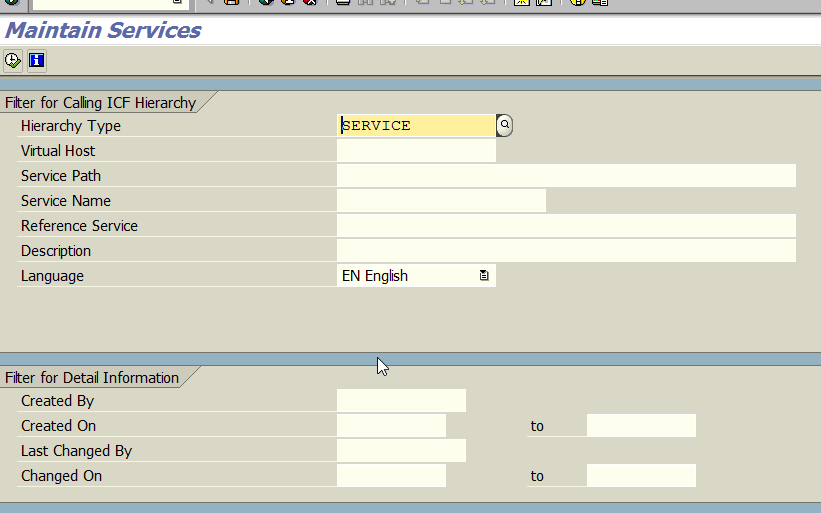
- Transaktion SICF
Step 5) Configure the SMTP connection to Office 365 / MS Exchange
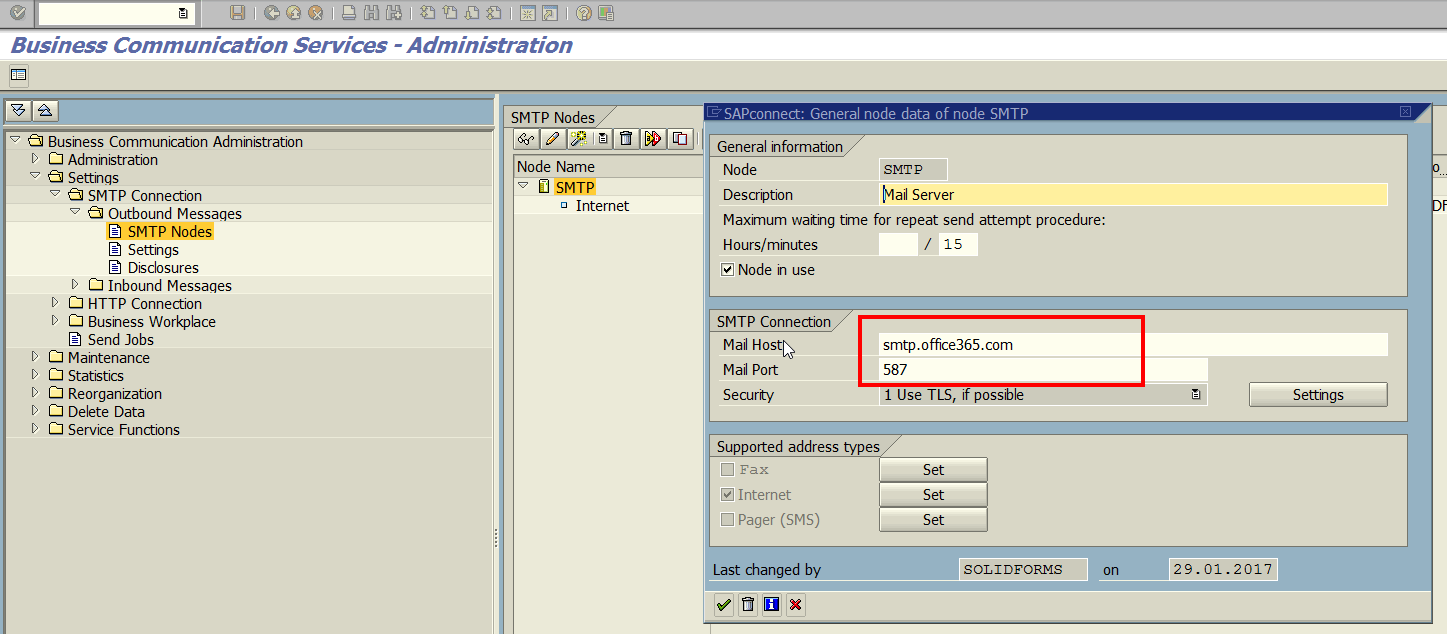
- Transaction SCOT
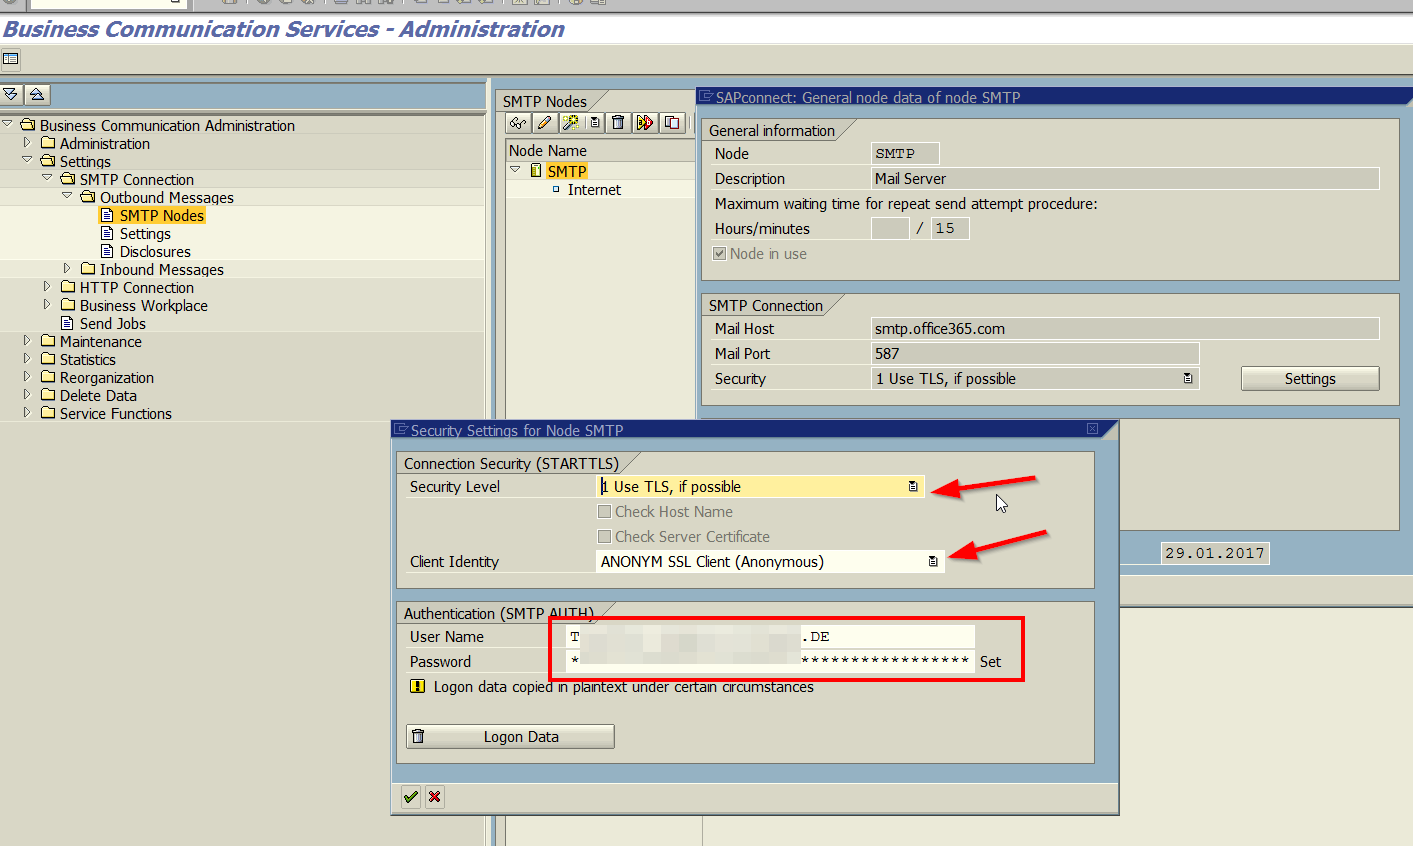
- Enter Mailhost (smtp.office365.com) and Port (587)
- Go to “Settings” and enter TLS and ANONYM
- Enter the user and password that you use to log in to Office 365 or the Exchange server.
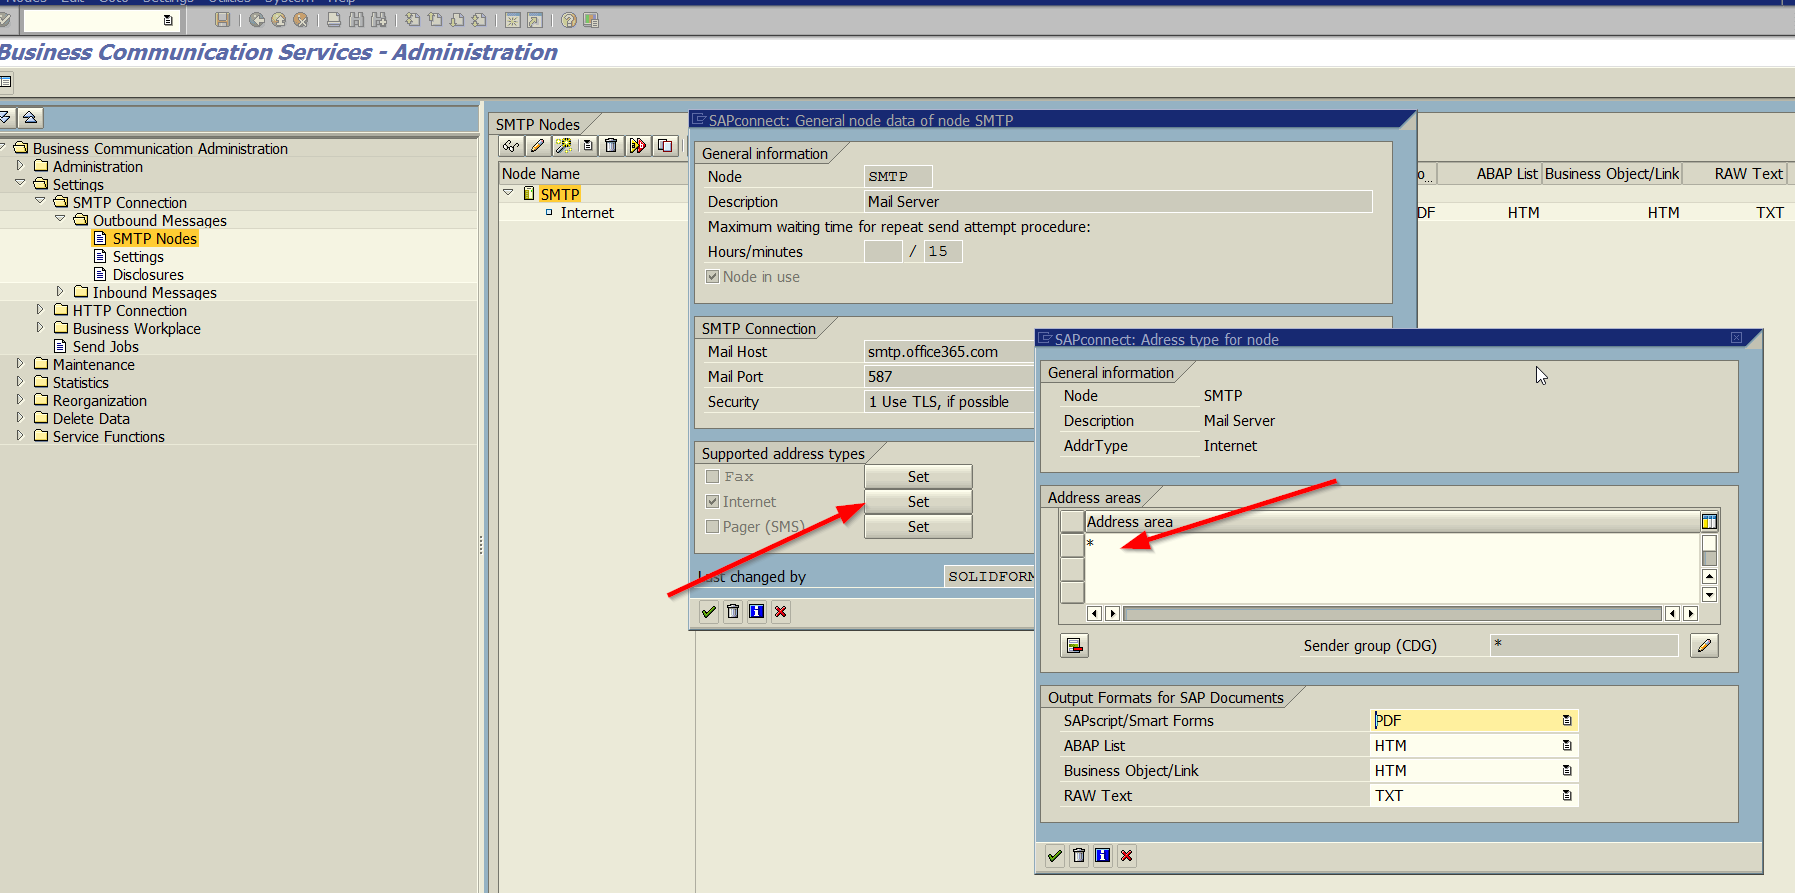
- Set the address range to “*” for the Internet connections.
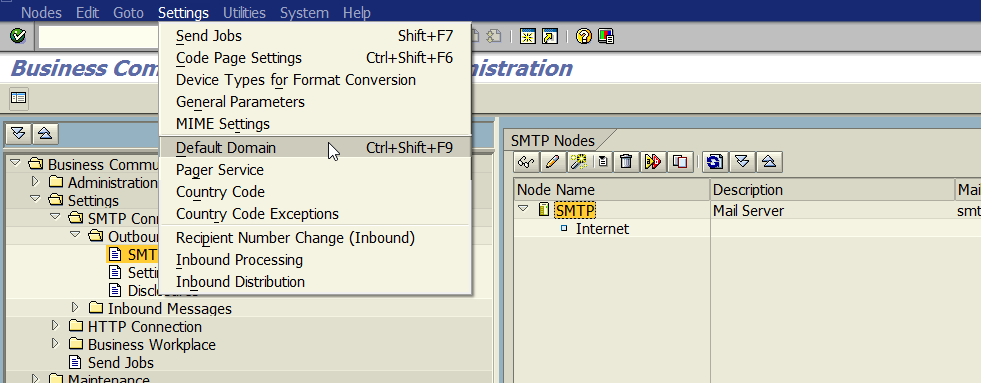
- The default domain is usually the domain from Office 365.
Step 6) Schedule a send job
- Transaction SCOT
Schritt 7) Testing the mail send process
- Transaction SBWP
- Write a mail to a recipient from the Office 365 domain.
- In transaction SOST, the dispatch can be triggered and the status checked.
- If the email arrives successfully at the receiver, one chooses now an email receiver from any domain. If an error occurs here, the authorization must be checked in the Office 365 / MS Exchange.
Further informations

